(Optional) Confirm installation of CodeDeploy agent
This is an optional step. If you experience problems during deployment, you will need to investigate the status of the CodeDeploy agent on the virtual machines. Or even if you don’t have any issues to track down, you can find out what the Heartbeat service is up to. To connect to Windows virtual machines you must use the PEM file containing the KeyPair generated during the installation process, to decrypt the Windows password, and then use the Microsoft Remote Desktop client to connect to the virtual machine.
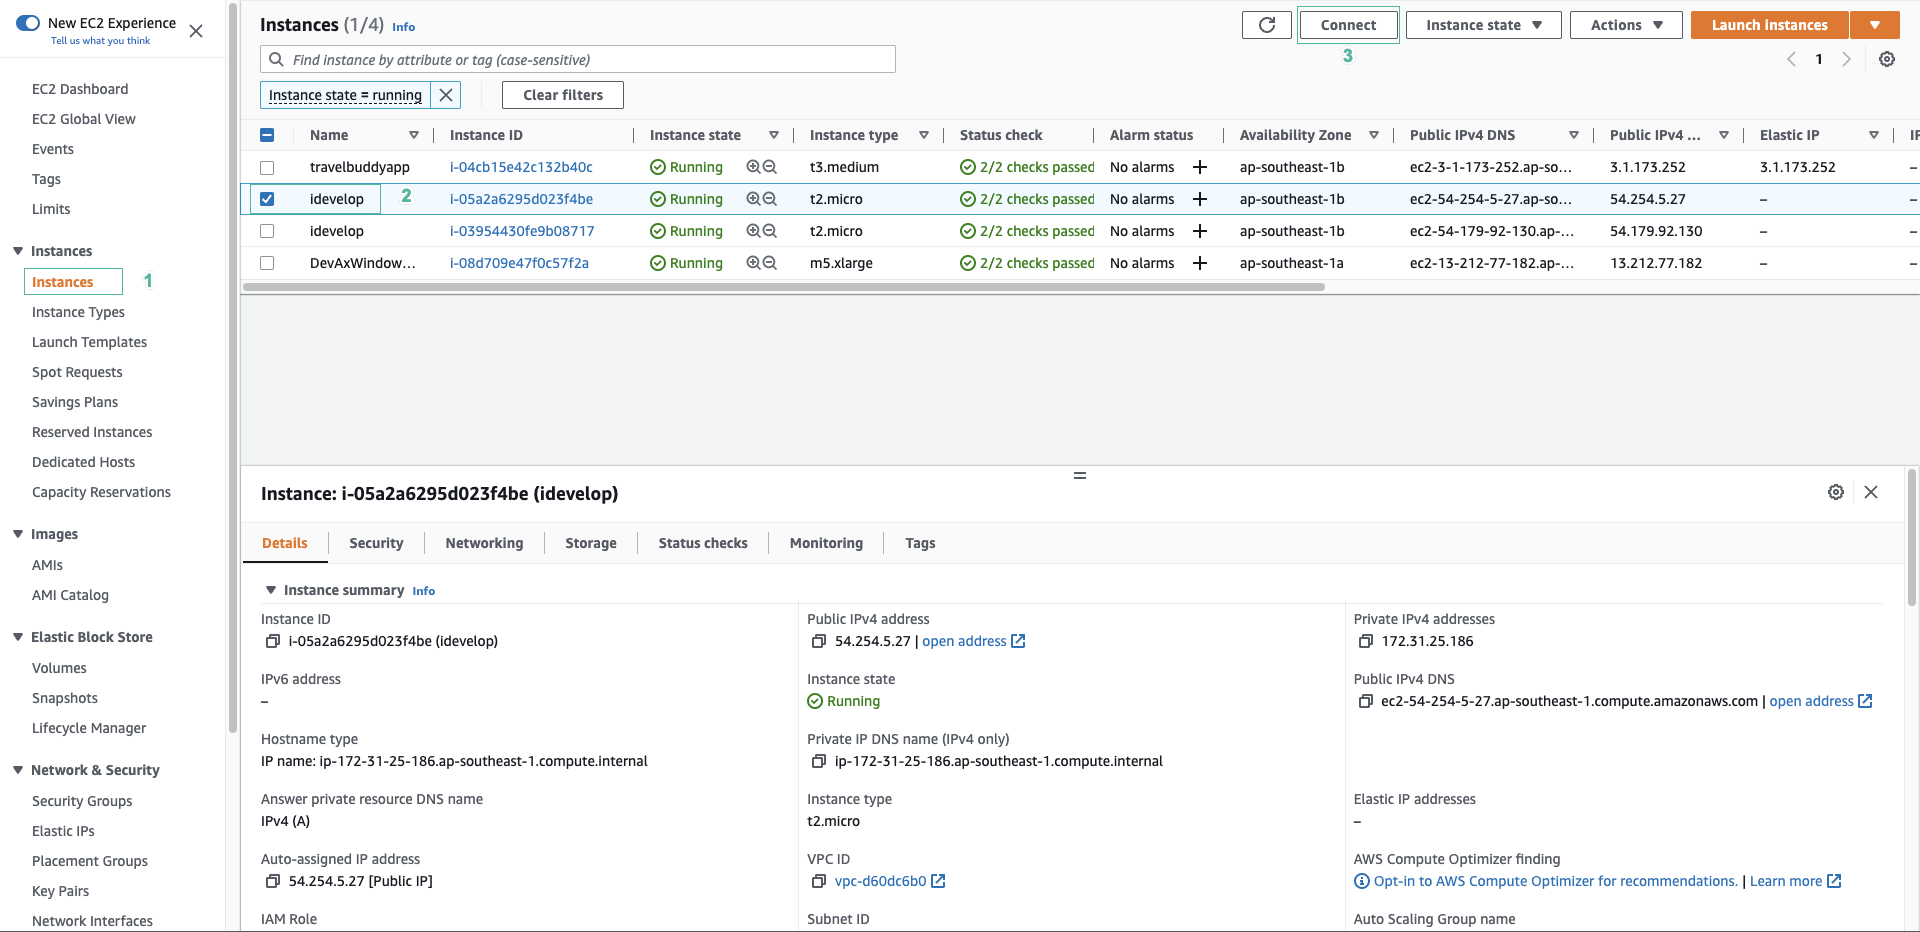
- Go to EC2 Management Console. Select one of the 2 virtual machines tagged idevelop.
- Select Connect.
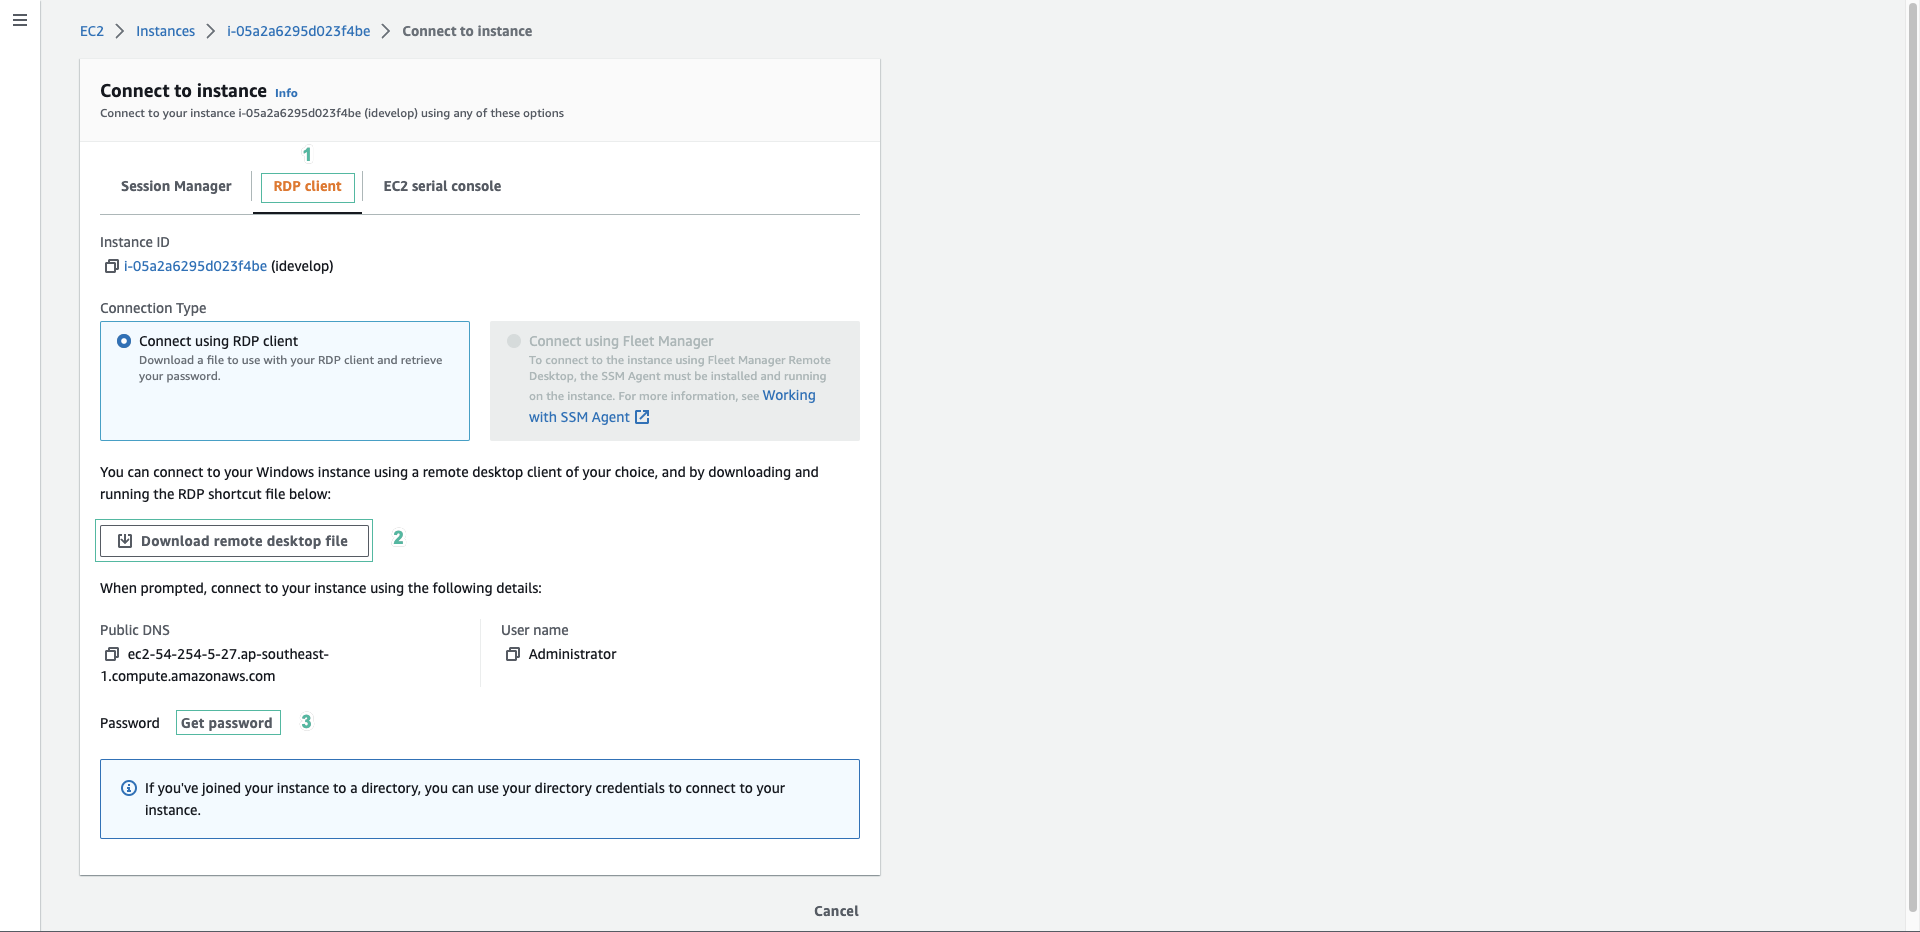
- Select RDP client tab and select Download remote desktop file to download the RDP file.
- Click Download remote desktop file.
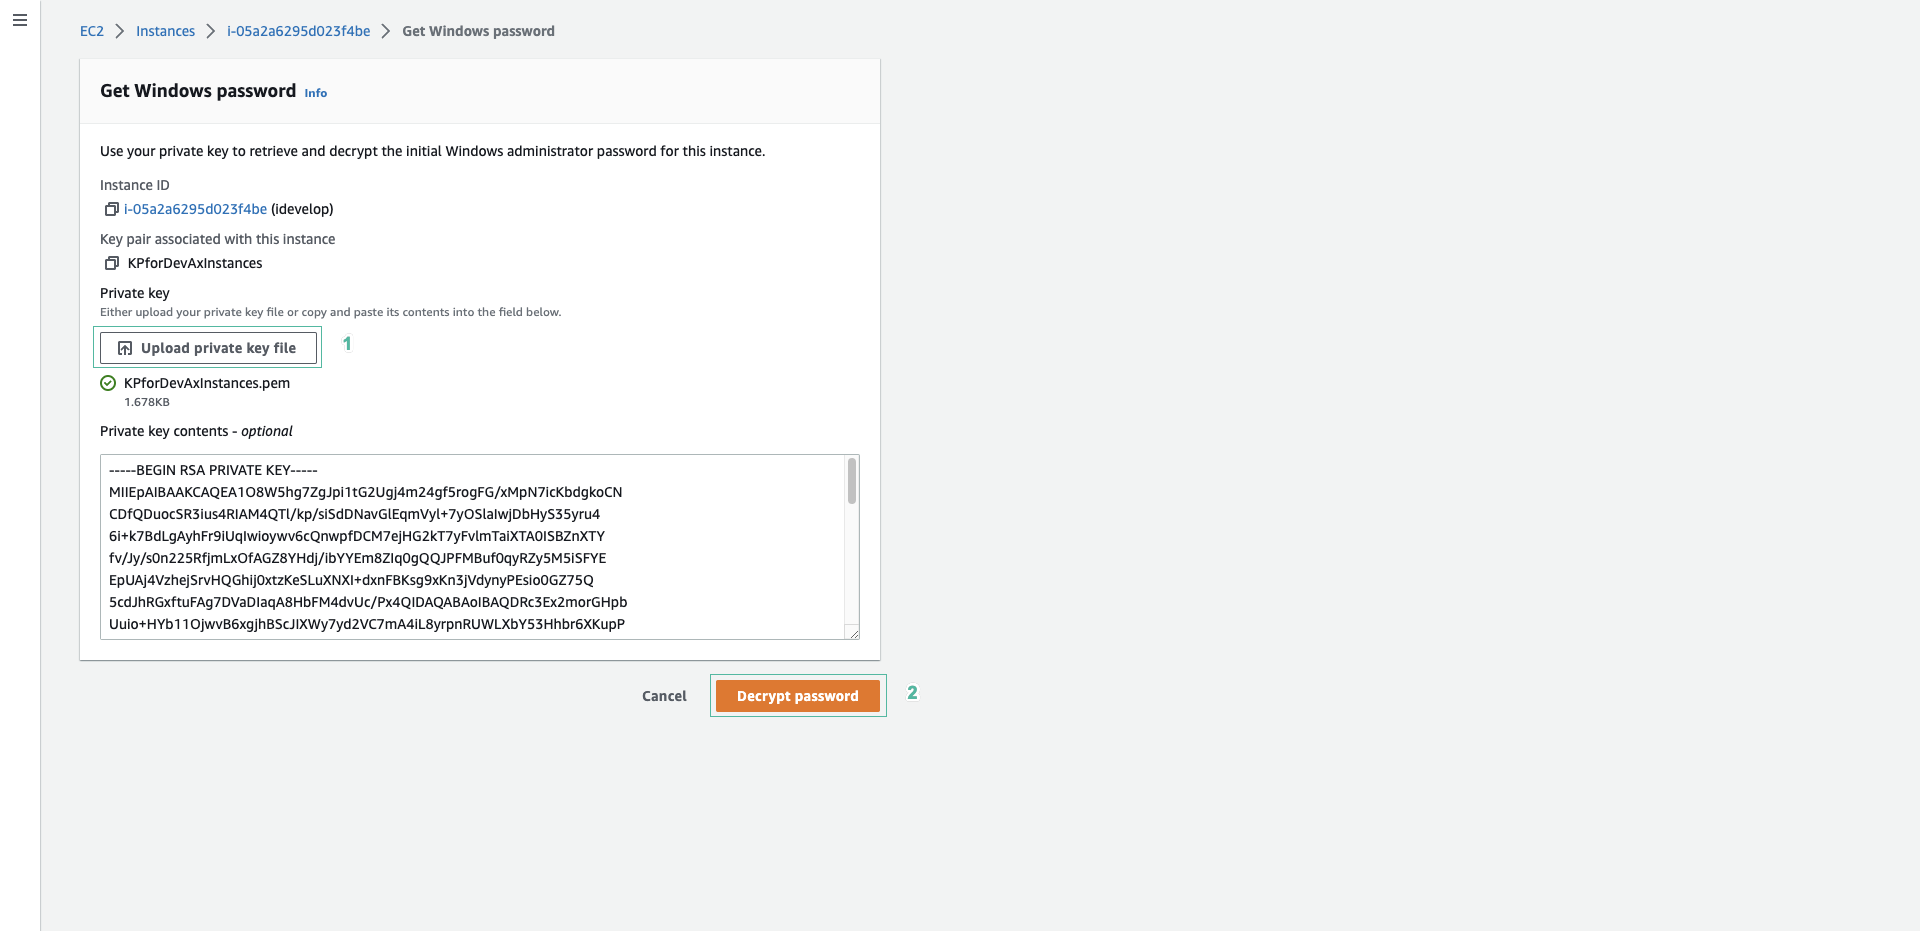
- Select KPforDevAxInstances keypair to decrypt Windows virtual machine’s password.
- Click Decrypt password.
- Copy password.
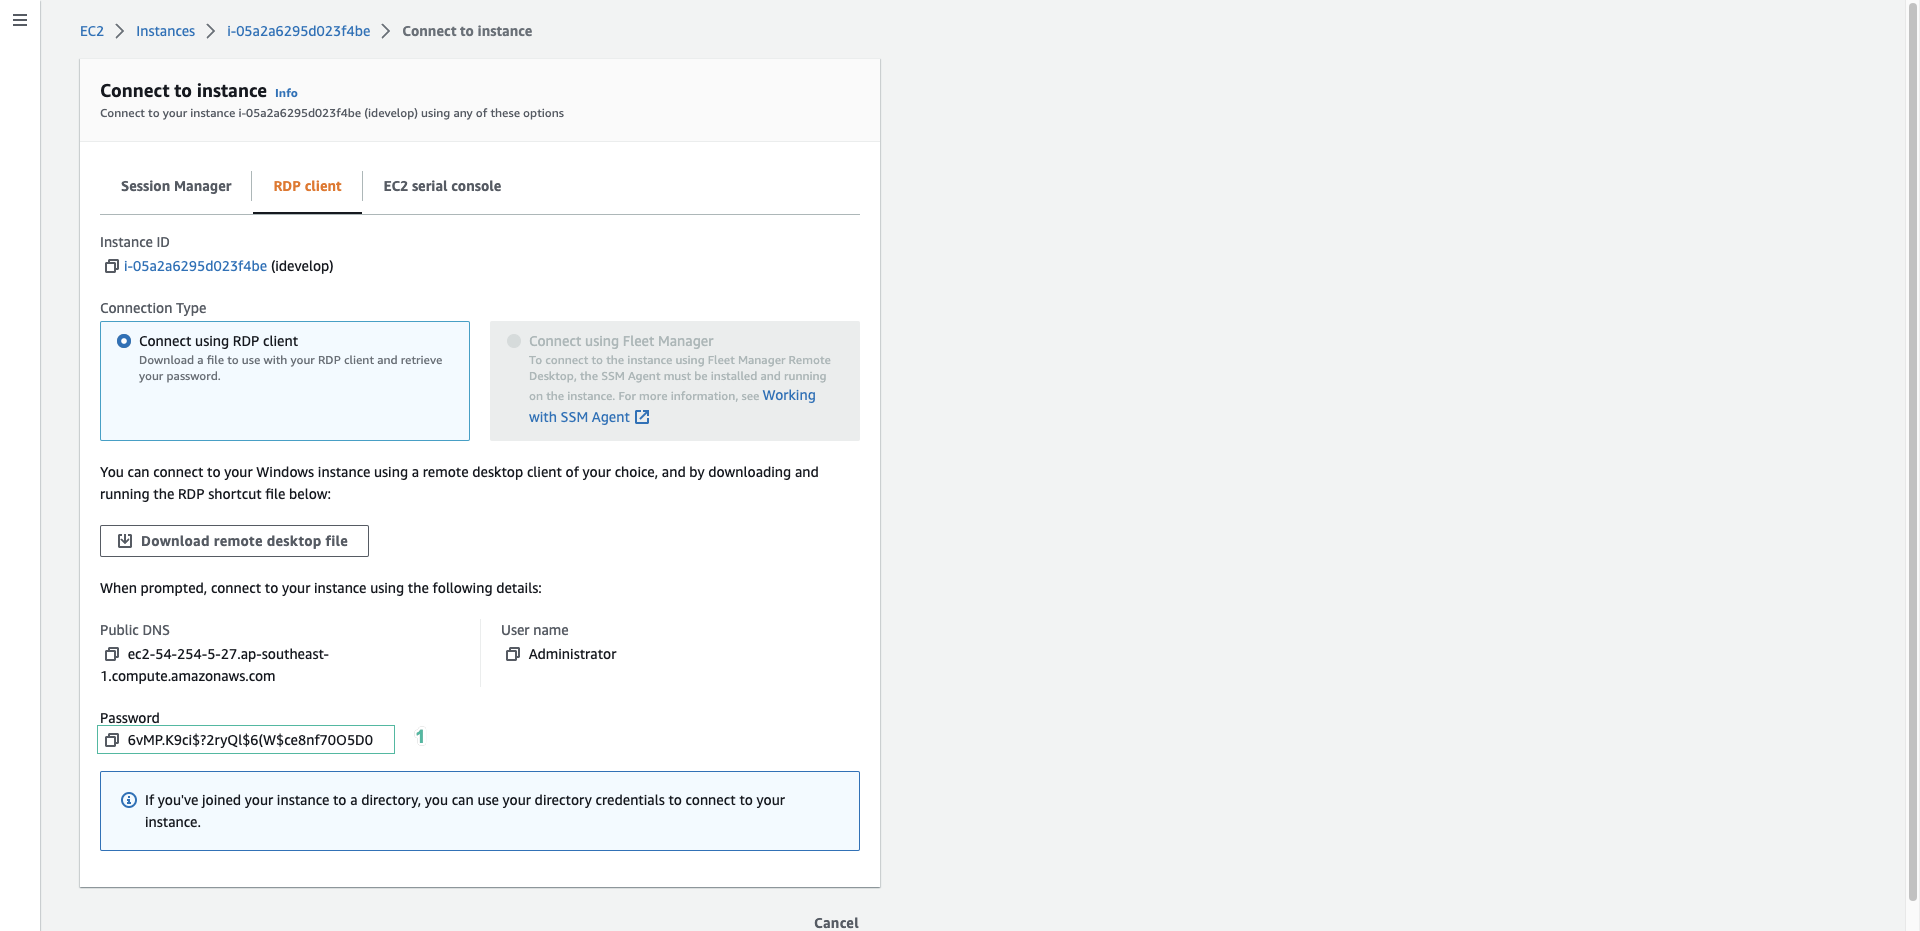
Use password and RDP file to access to Windows virtual machine.
-
In Windows virtual machine, open c:\temp\host-agent-install-log file.
-
Check and make sure that there are no lines with errors, such as: Failed to connect to server because this is an error that occurred during the installation.
-
If something goes wrong during the installation, you can try re-running it yourself with the following commands:
c:\temp\codedeploy-agent.msi /l*v c:\temp\host-agent-install-log.txt
- After re-install, check c:\temp\host-agent-install-log file again. If no error appears, the new creation progress of CodeDeploy is likely to succeed. You can create a new one with the AWS CLI command:
aws deploy create-deployment --application-name idevelopDemo --deployment-group-name HeartbeatInstances --deployment-config-name CodeDeployDefault.AllAtOnce --description "Retrying Initial Deployment" --s3-location bucket=idevelop-codedeployartefacts-<yourinitials>,key=CodeDeployHearbeatDemo.zip,bundleType=zip
Replace with your name the same as the name of the S3 bucket created in the previous step. The ZIP file will be copied to the S3 bucket.
Heartbeat service installation confirmed successfully
Assuming the CodeDeploy agent is successfully installed and running, and you want to confirm the deployment of the Heartbeat service successfully, you can perform the following steps:
- Use Service Control Manager to find AWS Heartbeat Demo Service. If this service shows Running in SCM, the service has been installed successfully.
- Open c:\Logs folder. The HeartBeatService file in this folder will contain following ouput if it launches successfully:
[INFO]09/14 08:33:18 - Initialising Heartbeat Service...
[INFO]09/14 08:33:18 - Heartbeat Service is now running...
[INFO]09/14 08:33:18 - Heartbeat - Deploy has Worked on Tuesday! Iteration 1
[INFO]09/14 08:33:19 - Heartbeat - Deploy has Worked on Tuesday! Iteration 2
...
...